You are using an out of date browser. It may not display this or other websites correctly.
You should upgrade or use an alternative browser.
You should upgrade or use an alternative browser.
UV Painting Project and Hellboy build
- Thread starter ZooHead
- Start date
I've been testing seam placement, unwrapping and pinning and it's not fun, or predictable.
I need more experience but I probably won't get it because it sucks.
Well, sometimes you just need good uv-maps, most of the time just a few minutes of work, because with that bit of exercise you'll get better at it. It will not suck less, but for a few minutes only. The fun comes then when you have those uv maps applied and can create whatever you want.
3d coat and Substance Painter certainly are great, but they aren't (that) cheap. So for starters you could use free quixel mixer and / or photoshop (but that I never tried).
P.S.: Your project is nicely coming along. With really good textures it will look real.
ZooHead
Active member
- Messages
- 5,646
Thanks @Hasdrubal, I needed a pep talk.
I've been trying to add seams before making the subdev editable as it is much easier.
After being made editable the seam wanders and meanders.
I think if I go over every inch/mm and correct that it will help.
Maybe this will help eliminate some patches that totally separate from the larger UV islands.
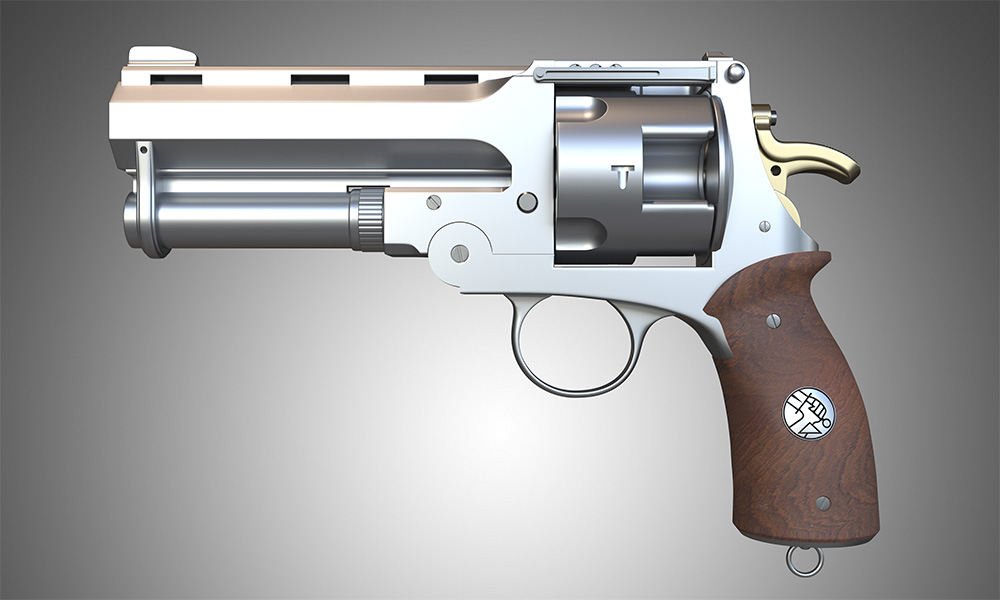
Here's a shot with a new wood texture on the grip and all parts in place.
Oops, still no trigger.
MonkeyT
0
- Messages
- 478
The wood texture is really getting there - that pattern is fantastic, I'm sure the worn, polished finish of it is a final detail.
I've seen this image used as the Feature Frame of Savage's Samaritan Videos in several places, so I believe it's an actual portrait photo of his prop:

If so, I think your handle may need slightly more of a bulge on the backside, near the bottom. I've also spotted several lesser quality props and replicas that had differently shaped handles, but I think the bulge feels like it gives the gun enough visual "heft" to handle the kickback from that massive a gun. The badge also seems to be slightly larger than yours, adding to that impression of a more solid base for the weight.
Still fantastic! Keep up the great work!
I've seen this image used as the Feature Frame of Savage's Samaritan Videos in several places, so I believe it's an actual portrait photo of his prop:

If so, I think your handle may need slightly more of a bulge on the backside, near the bottom. I've also spotted several lesser quality props and replicas that had differently shaped handles, but I think the bulge feels like it gives the gun enough visual "heft" to handle the kickback from that massive a gun. The badge also seems to be slightly larger than yours, adding to that impression of a more solid base for the weight.
Still fantastic! Keep up the great work!
ZooHead
Active member
- Messages
- 5,646
Thanks @MonkeyT, The blueprint I'm working from has a number
of differences, but I am adjusting as I see what Adam has done.
I like the bigger badge better, say that five time fast, and
also the screw for the hammer needs to be bigger I think.
Thanks for the observations. Sometimes I can't see the forest for the trees.
of differences, but I am adjusting as I see what Adam has done.
I like the bigger badge better, say that five time fast, and
also the screw for the hammer needs to be bigger I think.
Thanks for the observations. Sometimes I can't see the forest for the trees.
- Messages
- 1,178
Another side note... Marmoset Toolbag v4 now has 3D painting/texturing feature. It doesn't create UVs I think. It uses Tri-planer projection to paint seamlessly across UV islands.Thanks, after this experience I would welcome something like that.
I've been testing seam placement, unwrapping and pinning and it's not fun, or predictable.
I need more experience but I probably won't get it because it sucks.
Here is a video showing that >> https://marmoset.co/posts/intro-to-texturing-learn-toolbag-4-ep-3/
I only made it halfway through so far, but it looks nice.
--Shift Studio.
ZooHead
Active member
- Messages
- 5,646
Thanks @Shift Studio, I've got this one bookmarked.
I have a maybe stupid question. I don't know much about firearms but all I have seen had the grip in two halves screwed to a metal frame.
@Shift Studio: I admit, it looks very interesting (and it's somehow affordable)
@Shift Studio: I admit, it looks very interesting (and it's somehow affordable)
ZooHead
Active member
- Messages
- 5,646
@Hasdrubal: That's true, it is very common to see them made that way.
That being said it's not uncommon to see one piece grips,
and optional one piece grips for larger hands.
That being said it's not uncommon to see one piece grips,
and optional one piece grips for larger hands.
ZooHead
Active member
- Messages
- 5,646
After seeing what Marmoset Toolbag can do, I feel like I'm working in the stone age. 
But for now I'm trying some PS cloning to hide any visible seams.
Three clicks, one to place the cloning point, one to start
cloning and a shift click at the end of the seam.
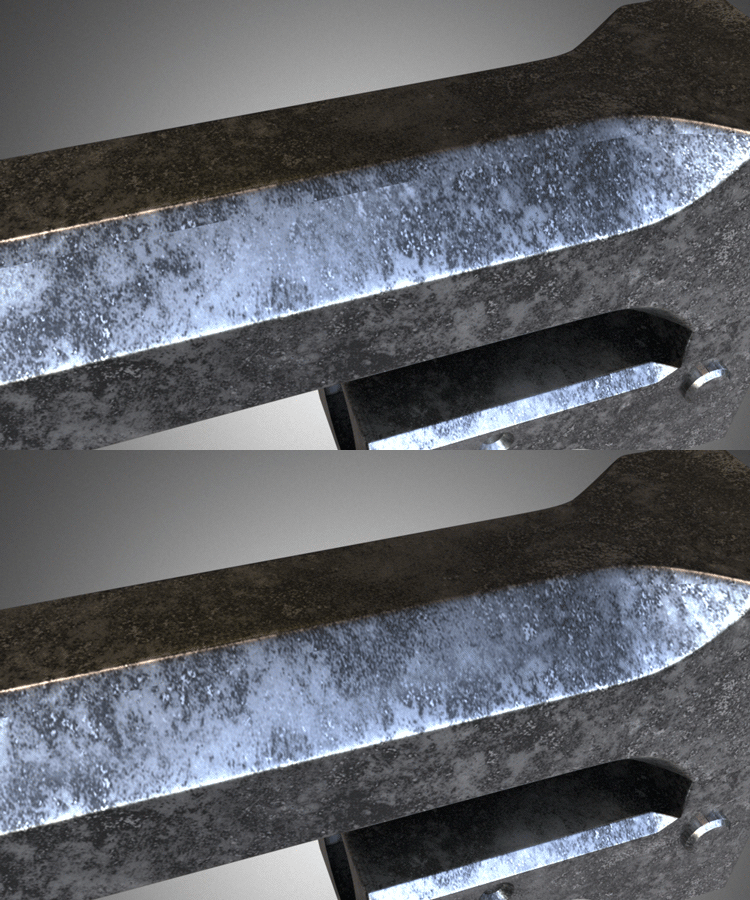
But for now I'm trying some PS cloning to hide any visible seams.
Three clicks, one to place the cloning point, one to start
cloning and a shift click at the end of the seam.
ZooHead
Active member
- Messages
- 5,646
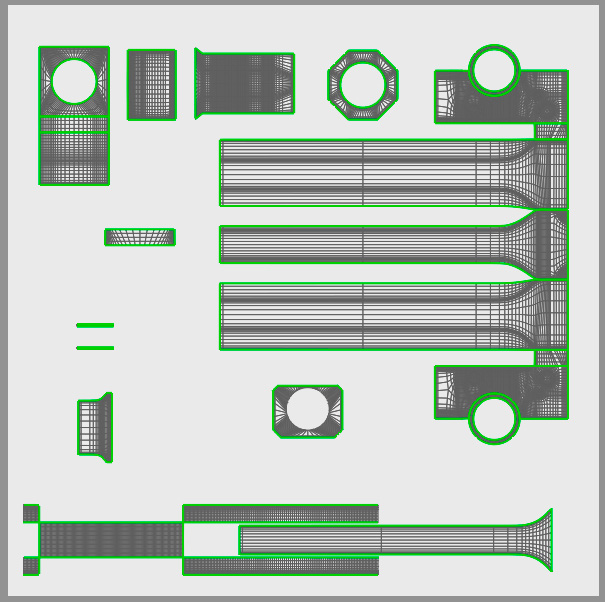
For this test I split the barrel object into smaller more manageable pieces.
That way it's easier to place the seams. I merged the pieces again after
activating the SubDiv Modifiers which makes the SubDivs editable.
The UV Unwrapping algorithms produced distorted UV islands.
And Pinning UVs was not an option because many of the seams
are in very dense areas and selecting points is a nightmare.
And in the UV editor there is no Loop Select.
So I unwrapped manually with the UV Mapper tool, section by section.
Flat for everything except the cylindrical shaped areas. Making note of the scale
of the mapper is important so map the largest section first and write down the scale.
This is because if you use the Center Projection command everything goes to zero and 1/1/1 scale.
The unwrapping algorithms offer the convenience of one click operation but they may not
behave as you expect because they may not like the way the seams are made.
This will be the final map...probably.
Last edited:
- Messages
- 1,178
@ZooHead Your commitment to this project is impressive!
You are likely aware but just in case, here are a couple of methods for UV manipulation that may prove useful here or in the future.
- You can set your seams on your lower poly model. Once you apply your SubD the seams will still be there. If you unwrapped while in low poly, you will have to unwrap again (possibly after pinning some points?)
- When you need to select points for manipulation in in UV editor, you can actually do it in 3D viewport - they will show up selected in UV editor
- Make use of selecting polygons or edges in 3D viewport then call the command 'Selection/Convert Selection To/Convert Selection To Points' - they will show up selected in UV editor
- Make use of the script 'UV Stepper'. Among other things, you can use it to align points vertically or horizontally in UV workspace. You can select 2 points and call 'get angle'. The resulting angle will tell you angle you would need to rotate by to get to horizontal. You can select an island and call 'get scale' The resulting value is the amount you would need to scale by to have the island fit exactly in the UV workspace without rotating.
Hope you or someone else finds that useful.
--shift studio.
ZooHead
Active member
- Messages
- 5,646
Thanks @Shift Studio, selecting points on the model doesn't select them in the UV Mapper,
but edge and polygon selections do, so I tried your suggestion about converting an
edge loop selection in the model to points and that does work.
The UV Stepper sounds promising, thanks again.
but edge and polygon selections do, so I tried your suggestion about converting an
edge loop selection in the model to points and that does work.
The UV Stepper sounds promising, thanks again.
- Messages
- 1,178
Its been a while since I've done any 3D work so I had forgotten this quirk...Thanks @Shift Studio, selecting points on the model doesn't select them in the UV Mapper,
but edge and polygon selections do, so I tried your suggestion about converting an
edge loop selection in the model to points and that does work.
The UV Stepper sounds promising, thanks again.
Selecting points manually with the selection tool in 3D viewport also selects them in the UV workspace
Selecting points using area select, loop select, ring select tools in 3D viewport does not select them in the UV workspace
Looking forward to seeing more progress.
-- Shift Studio.
edit: Also group select points in 3D viewport also selects them in UV workspace. edit: nope it doesn't
ZooHead
Active member
- Messages
- 5,646
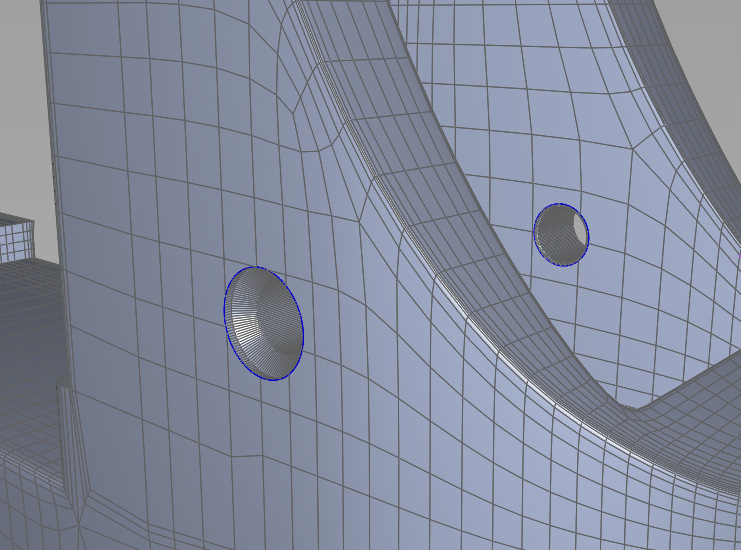
I thought I'd explain the process I use to prepare a subdivided object for UV mapping.
I'm working on the frame object, which also has active Booleans.
• First I copy the object to a new file, or do a save as and delete everything else.
• In the new file, I copy the object before I make it editable so I have the original for safety.
• Now I can make any final changes to the Booleans and SubDev settings and then make it editable.
• Lastly carefully delete any edges and polygons that are unnecessary to reduce poly count.
An interesting note:
• Creases are no longer needed, except for those from some Booleans.
• These plus the objects Normal Break smoothing setting keeps those Booleans made editable looking correct.
ZooHead
Active member
- Messages
- 5,646
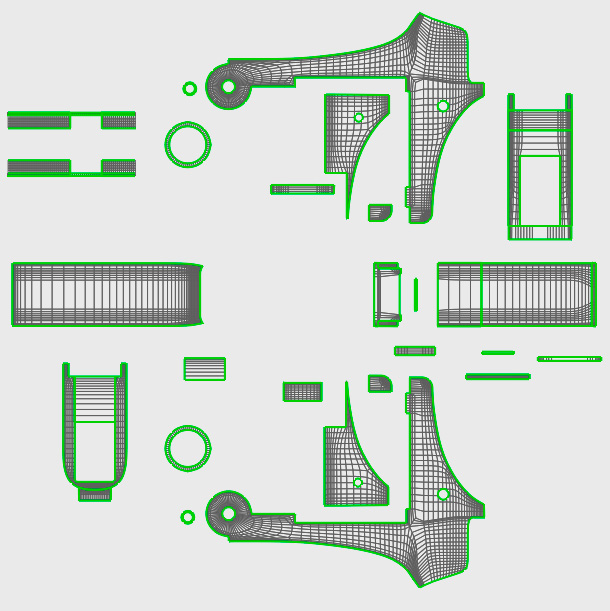
I used a different technique to unwrap the frame object, but still using the UV Mapper.
• This time I used the flat mapper from world center and did away with the foolishness of positioning and scaling.
• All you need to do is rotate the UV Mapper, leaving it at 0/0/0 position and 1/1/1 scale.
• Flat mapped all flat sections first, then cylindrical where appropriate.
Placing the seams takes longer than mapping I think.

