bugaboo
0
Terrain Material
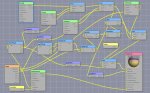
Just testing out the new material system. Looks like you can get the height from the state node. From there use gradient nodes and mixer nodes to get a terrain shader.
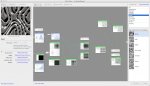
Only gripe I have is that the island is completely black in 3d view. So, it makes it difficult to align the ocean with the shader in the scene and when I move the lighting I can't get much immediate feedback.
Also, it would be nice if I could group nodes together because things turn into spaghetti really fast in the node editor.
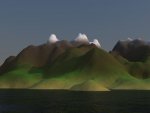
Sure it could be more detailed but I'm just doing a learning exercise.
Just testing out the new material system. Looks like you can get the height from the state node. From there use gradient nodes and mixer nodes to get a terrain shader.
Only gripe I have is that the island is completely black in 3d view. So, it makes it difficult to align the ocean with the shader in the scene and when I move the lighting I can't get much immediate feedback.
Also, it would be nice if I could group nodes together because things turn into spaghetti really fast in the node editor.
Sure it could be more detailed but I'm just doing a learning exercise.
Attachments

Last edited:
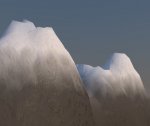
") If I used modulo then its like someone sand papered it.
If I used modulo then its like someone sand papered it.