Strategy for logos for tshirts.
Hi Guys.
attached the project if anyone can adapt it to get it working.
I have the 3D model of a tshirt and I am trying to achieve the following
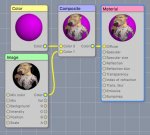
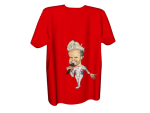
1. Get the base colour of the shirt set as a material.
2. Use the PNG image ( Gary) on top of the base colour as a separate material.
3. export to Unity ( can do as FBX and retain materials)
4. Within unity be able to swap out the materials in code ( both the base material and the PNG). I can do this.
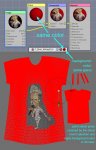
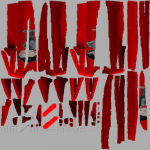
Using the JPG with a large white / red outer background and turn of tiling will achieve what I need ( as the outer white / red will colour the tshirt.)
This is not ideal as I have to create a different version for each colour.
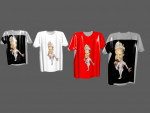
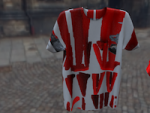
In the render ( image 1 & 4 ) I would expect the first material colour to show through.
Also the png has a black area around it. Is it possible to change some settings to hide the black area and allow the base colour to show through.
Cheers
Steve Warby
Project located at.
http://www.aceoftoons.com/temp/Archive.zip
Hi Guys.
attached the project if anyone can adapt it to get it working.
I have the 3D model of a tshirt and I am trying to achieve the following
1. Get the base colour of the shirt set as a material.
2. Use the PNG image ( Gary) on top of the base colour as a separate material.
3. export to Unity ( can do as FBX and retain materials)
4. Within unity be able to swap out the materials in code ( both the base material and the PNG). I can do this.
Using the JPG with a large white / red outer background and turn of tiling will achieve what I need ( as the outer white / red will colour the tshirt.)
This is not ideal as I have to create a different version for each colour.
In the render ( image 1 & 4 ) I would expect the first material colour to show through.
Also the png has a black area around it. Is it possible to change some settings to hide the black area and allow the base colour to show through.
Cheers
Steve Warby
Project located at.
http://www.aceoftoons.com/temp/Archive.zip