Cheetah3D 7.3 Beta 1

Cheetah3D 7.3 Beta 1

Hi,
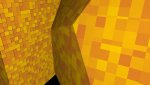
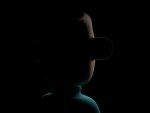
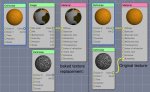
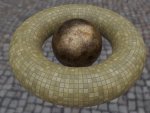
Cheetah3D 7.3 is ready for beta testing and it offers many new features like a dedicated PBR shader node which makes the usage of PBR textures much easier. Hereby Cheetah3D uses the metalness/roughness workflow known from the Disney Principal shader.
v7.3 also adds initial support of the glTF/glb file format which is becoming more and more popular under game developers and for display of 3d content on the web. glTF is a very efficient file format designed from ground up for 3D content delivery. It even allows the embedding of textures.
Last but not least v7.3 brings back refractive caustics in Falcon.

This is a pretty early Beta version and quite some functionality is still missing. Nevertheless it's should be already fun to experiment with the new features. Since I have quite some small stuff on my todo list the final release of v7.3 might not be before June.

New features in Cheetah3D 7.3:
Code:
-added PBR shader (Falcon recommended)
   -based on Disneys Principled shader
   -added support for GGX BRDF
-added glTF exporter
   -supports glTF and glb (binary glTF) output
   -supports static meshes
      -vertex
      -normal
      -two uv sets
      -vertex color
   -supports embedded textures
   -animation support yet missing
-added support for refractive caustics to Falcon renderer
-added "R", "G", "B" and "A" output channels to Image node
-added support for DirectX style normal maps
-changed specular color of default material to black
-improved node editor (copies all possible parameter values to new shader)
-fixed bug in node editor (fixed node position when changing shader node)
-fixed redraw bug in node editor
-fixed .h export problem
-fixed bug in material preview of state node
-fixed crashing bug in material import (failed to properly connect nodes)
-fixed bug in photon mapping
-fixed object selection bug
-fixed bug in node editor (displayed broken connections)


Attention:
PLEASE BE AWARE THAT THIS IS BETA SOFTWARE SO DON'T USE IT ON IMPORTANT DATA.

Download link of Cheetah3D 7.3b1:
http://www.cheetah3d.com/download/Beta/Cheetah3D7.3b1.dmg

I hope you like the new features in Cheetah3D 7.3.:smile:

Kind regards
Martin
 

Attachments

  • PBR2.jpg
    PBR2.jpg
    125.7 KB · Views: 1,062
  • Untitled2.jpg
    Untitled2.jpg
    82.5 KB · Views: 1,017
Last edited:
You really give all for your product. Thanks. It's especially good to see the pbr and the caustics coming back (looks good, the glass, but ... ahem ... still not enough bounces ;) ).

It is impressive.
 
Fantastic work Martin! Thanks so much.

I've only been testing the PBR shader so far - mostly testing with 'hand-painted' PBR materials and I've found the results very close to what I was expecting.

-- Shift Studio.
 
Last but not least v7.3 brings back refractive caustics in Falcon.

Wow what a wonderful surprise!
Thanks for being such a responsive developer.
Now the switching between versions can be reduced.

I have been reading much (and understanding less) about the PBR shader and now tested it the whole day but yet failed to come up with something procedural.

Also when using it with those free textures and then changing back to the old material node with the same textures (abandoning the whole specular & roughness stuff) I do not see much difference.

There surely is some advantage in there somewhere but I have yet to catch it.

While playing with the reintroduced caustics I noticed an old problem:
Reflections of lights in glass bodies are not consistent.

When rendering a scene with a mesh light vs an area light, the mesh light gets reflected and the area light not.

I would understand if non physical lights like point or distant show no reflections, but an area light with visibility turned on should not render differently than a mesh light (assuming the rendering of emissive bodies being the realistic way).

image.jpg
 

Attachments

  • caumeng.jas.zip
    13.6 KB · Views: 342
Also there is a new subsurface shader in the list (but it seems like it doesn't work yet) :tongue:

I noticed that too! :D :cool:

I've been playing with the PBR stuff a little too and I'm trying to learn how it works.

This article on it from Marmoset is pretty good. There are a few links at the bottom that go in depth in an easy to understand way on the subject.
https://www.marmoset.co/posts/physically-based-rendering-and-you-can-too/

As usual thanks for the update Martin!
 
First PBR success

Found a big nugget right in the Oldtown Square!!

nugget.jpg

Pavement from here, Maps for the nugget made with PS.

@Swizl: Thanks for the link!
 
Last edited:
What is a mesh light and where do you find it?
Hi Uncle,
Whenever you assign an emissive material (like solid shader) to a polygon object, this object emits light into the scene and can therefore be called a mesh light.
So you can turn any object into a meshlight just by adding an emissive component in the material tab (or use solid shader directly).

Please also check the file in post #5 (when enabling the mesh light, please disable the area light or vice versa).
 
Materials and Polygon Understanding

Hi Forum

I'm trying to work out how baking textures improves render times. So I made a super simple scene, but found that materials behave differently on different shapes:

Here's a cube and a polyhedra. Notice the way that the polyhedra doesn't take on the height part of the bump mapping.

Also, I thought these were polygons, but I can't add a bake-texture tag to them.

This was made under 7.3b1 -- any pointers please?

Regards


Andy
 

Attachments

  • MaterialBumpMap.jpg
    MaterialBumpMap.jpg
    106 KB · Views: 499
  • WhatsAPolygon.zip
    9.9 KB · Views: 312
Great. Many thank's Martin.
I try Subsurface but it seems that it does not work.
 

Attachments

  • Test_SSS.jpg
    Test_SSS.jpg
    13.9 KB · Views: 489
To answer part of my own question

To be able to add a bake-texture tag, they needed to be:

'made editable'

Here's a before and after speed test. Will introduce some more lights to test further.

Regards


Andy
 

Attachments

  • Screen Shot 2018-04-27 at 09.40.26.png
    Screen Shot 2018-04-27 at 09.40.26.png
    102.2 KB · Views: 500
That helped a bit ....

Frank,

Seeing your render manager helped a bit.

I believe there are a few extra stages that are not clear in the docs.

1) you have to click OK in the bake-texture tag in each polygon.
2) you have to bake the texture for each polygon
3) you have to make a new material for each polygon with the image saved from (2).

I think there is something else I'm missing.

It nearly worked this time:


Regards

Andy
 

Attachments

  • Screen Shot 2018-04-27 at 10.38.18.png
    Screen Shot 2018-04-27 at 10.38.18.png
    157.6 KB · Views: 502
You need to exchange the baked texture with your original texture and skip your lighting set-up. If you´re using Cheetah turn off camera light and enable Ambient Occlusion and you´re got to go.

Cheers
Frank
 
Hi Frank.

I've been searching through the help and the UI to try to understand 'exchange'.

I used the same material for both objects.

Unfortunately I'm lost at the moment, so I need another pointer to get back on track ...

Regards


Andy


You need to exchange the baked texture with your original texture and skip your lighting set-up. If you´re using Cheetah turn off camera light and enable Ambient Occlusion and you´re got to go.

Cheers
Frank
 
Once you have baked the texture to UV1; save the image and connect it to the diffuse channel of the former texture. You´ll now use the baked one instead of the original. And you no longer need your original light set-up - put it in a folder and disable it. Got that so far?

Cheers
Frank
 

Attachments

  • BakedTextureReplacement.jpeg
    BakedTextureReplacement.jpeg
    86.3 KB · Views: 492
Last edited:
Also there is a new subsurface shader in the list (but it seems like it doesn't work yet) :tongue:

Ops, I forgot to completely disable this work in progress feature.:redface: That shader shouldn't have appeared in that beta. I will completely disable it in the next beta. Subsurface scattering won't make it into v7.3.

Thanks for reporting.:smile:
 
Hi Uncle,
Whenever you assign an emissive material (like solid shader) to a polygon object, this object emits light into the scene and can therefore be called a mesh light.
So you can turn any object into a meshlight just by adding an emissive component in the material tab (or use solid shader directly).

Please also check the file in post #5 (when enabling the mesh light, please disable the area light or vice versa).

Thank you I figured it out after examining your file. Thanks for the answer though. Should you also disable the Camera light,?
 
Back
Top