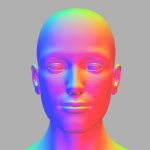
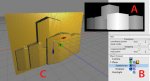
Creating normal maps
Hello All,
Tile Guy Here; I have been creating my ceramic tile work using the relief map. I have been taking grayscale images and elevating the relief.
Then exporting to a CNC Milling Machine.
I would like to create a scene in Cheetah and use the following techniques to create a elevation/normal map. http://www.pinwire.com/article82.html
Can anyone tell me if this is possible?
Thanks