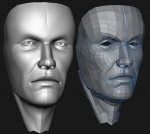
Face tutorial

Hi.
I´m really sorry, but I think you´re having me on.
It´s an triangulated, when not the same file again. If this is your strange kind of humor go ahead, but I´m off now. That is an underexposed MonZoom style modelling - I can´t see any Cheetah3d related herein.
So I can´t help you here unless you find a way to produce some (at least a few) quad strips).
 

Attachments

  • TrisMessMesh.png
    TrisMessMesh.png
    58.2 KB · Views: 531
Hi.
I´m really sorry, but I think you´re having me on.
It´s an triangulated, when not the same file again. If this is your strange kind of humor go ahead, but I´m off now. That is an underexposed MonZoom style modelling - I can´t see any Cheetah3d related herein.
So I can´t help you here unless you find a way to produce some (at least a few) quad strips).

Listen, I'm not trying to be funny, I'm seriously just confused about how to use this program and I'm a new beginner :-? . I don't know why you would think I'm making a joke out of this, because quite honestly, if this was a joke, I wouldn't be asking for your help or anyone's help for that matter. I haven't used any other program here BESIDES cheetah3D either, so I don't appreciate you accusing me of lying. Perhaps can you can explain to me how to make quad strips if I haven't done so.

I'm sorry if you are getting frustrated. I'm not trying to upset anyone here. I'm just trying to learn something new.
 
I would recommend you to buy these movies made by fused here in the forum, that will learn you how to use the software:

http://www.cheetah3d.com/training.php

Or you seriously have to read up on the documentation that you find in the help menu in cheetah3d.

Good luck with further modeling in cheetah3d, I am sure you will make it if you just use some time to read the documentation about all the tools in cheetah3d.

But the easiest way to learn cheetah3d is the movies made by Fused.
 
Hi.
You´re now confronting here for 10 days now with an identical file.
You wrote on 9th of August: "I noticed that in the video, the guy was able to adjust it without any of them popping out of place......"
So I may start over and ask you: What guy and video are you talking about? Did he used tris for modelling or what? :confused:

With kindest regards
Frank
 
I would recommend you to buy these movies made by fused here in the forum, that will learn you how to use the software:

http://www.cheetah3d.com/training.php

Or you seriously have to read up on the documentation that you find in the help menu in cheetah3d.

Good luck with further modeling in cheetah3d, I am sure you will make it if you just use some time to read the documentation about all the tools in cheetah3d.

But the easiest way to learn cheetah3d is the movies made by Fused.

Thank you for the link to the Fuse Tutorial. I've glanced at stills from the video before, but now I think I'll buy it :)
 
Hi.
You´re now confronting here for 10 days now with an identical file.
You wrote on 9th of August: "I noticed that in the video, the guy was able to adjust it without any of them popping out of place......"
So I may start over and ask you: What guy and video are you talking about? Did he used tris for modelling or what? :confused:

With kindest regards
Frank

Well, I meant the face tutorial video at the beginning of the thread that was posted by Fuse :) I knew I should have worded myself a little bit better, so I apologize for that. When he was modeling, the quads or faces as he referred to them stayed in place. He clicked "c" for cover and then when he pulled out new faces and then he alligned them to make a chin, but the faces stayed in place and didn't pop out. Whereas, when I do it, lol, it ends up not being alligned. I was wondering how he was able to do it without that being a problem.

 
It is important that first you make one quad strip, then press "esc" button, then hover over one of the corners when you are beginning on the next quad strip, and press the "esc" button again when you have finished quadstrip number two. If you later on find that some points are not hanging together, you could always use the weld tool to link them together to one point instead of two points that is very close but not connected like you have a lot of in your file!
 
It is important that first you make one quad strip, then press "esc" button, then hover over one of the corners when you are beginning on the next quad strip, and press the "esc" button again when you have finished quadstrip number two. If you later on find that some points are not hanging together, you could always use the weld tool to link them together to one point instead of two points that is very close but not connected like you have a lot of in your file!

Thank you for that tip :smile: ! I did use the weld tool from time to time. I have a question, whenever I use it, sometimes I try to adjust things and pull on certain quads to get it to bend a certain way, and it'll pull out a new quad altogether. Is that normal?
 
It is important that first you make one quad strip, then press "esc" button, then hover over one of the corners when you are beginning on the next quad strip..
Hi Christian.
You can speed up your workflow when you just double click at the fourth point. So you can instantly start with the next polygon. And if you choose "Quad strip" as type Cheetah3d will generate quads every 4 clicks for you.

@ MotorPsycho. Hopefully you don´t hit "C" when a polygon is selected but an edge, because that is what Fused did when it comes to the chin area.

Cheers
Frank

Yup I don't, :). I select an edge and then press ctrl + click on it, and then scroll down the menu to select COVER. But for some reason, they are still popping out. But I figured out that I've been making too many quad strips as well, so I've been confusing myself even more, lol. I could try to send you another file Frank, if you're up for it, and this time, they won't be triangulated. Sorry for frustrating you before! I really appreciate all the help I've been getting.
 
Hi Christian.
You can speed up your workflow when you just double click at the fourth point. So you can instantly start with the next polygon. And if you choose "Quad strip" as type Cheetah3d will generate quads every 4 clicks for you.

@ MotorPsycho. Hopefully you don´t hit "C" when a polygon is selected but an edge, because that is what Fused did when it comes to the chin area.

Cheers
Frank

Thanks for the tip Frank, I had acctually forgot about that, haven`t been modeling for some time now, so it`s easy to forget those small little timesavers when you don`t use them often!:smile:
 
Never mind! Loading and inspecting the same file 5 times made me feel like Bill Murray in "Groundhog Day" ;)
Send it over.

Regards
Frank

Thanks for understanding Frank! This is just the mouth, it looks somewhat like what Fuse was doing, only slightly more amateur :redface: Here's a preview:


Does this seem better?

If it seems uneditable, I've found a solution, click "Objects" and then select "Make Editable"...although, you probably knew that :smile:
 

Attachments

  • mouthchin.jas.zip
    3.3 KB · Views: 507
Hi Moto.
Seems you´re doing quite a lot of edge covering operations one after another.
But you can cover as many edges as selected with one strike.

You can simply clean up your mesh in say polygon mode with the "optimize tool". Choose a "weld radius" at 0.1 and hit apply and you will notice the loose points will merge. For the left 2 points inside the mouth choose the "weld tool" for merging them. That´s the lesson for now.;)

Happy modelling.

Cheers
Frank
 
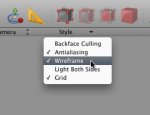
A good way to see what happens to your mesh is to look at it as a wireframe:
wireframe.jpg

As you can see at the picture below, you have a lot of extra points that you don`t want.
many points that need to be welded.jpg
All these can be welded together. But if you do it right from the start you don`t have to do this clean up at all. So do as Frank told you and use the cover tool on several edges at the same time. But they need to be at the same edgeloop like in the picture below:
cover on several edges.jpg
 
Hi Moto.
Seems you´re doing quite a lot of edge covering operations one after another.
But you can cover as many edges as selected with one strike.

You can simply clean up your mesh in say polygon mode with the "optimize tool". Choose a "weld radius" at 0.1 and hit apply and you will notice the loose points will merge. For the left 2 points inside the mouth choose the "weld tool" for merging them. That´s the lesson for now.;)

Happy modelling.

Cheers
Frank


Awesome! Quick noob question, where's the optimize tool?


NEVERMIND, I found it :D I'm going to try this tonight and get back to you guys with the results...

Thanks for your help, Frank! :smile:
 
Last edited:
Hey guys, The tips you gave me worked out incredibly well. I've gotten this far on the face.


One question: I'm trying to work out the eyes. I ended up making ring cuts and then deleted quads, and now my eyes look uneven. How do you make holes and for the eyeballs what do you normally use?
 
For the eyeball you just use the ball object and rotate it 90 degrees like you can see at the picture below.

Eyeball.jpg

For the eyes you normally dont cut it out you make it by making the geometry around the eyehole so you don`t need to make a hole afterwards.
The reason why you need to rotate it is that, then you can use the circles on the ball to texture the iris!

Have a look at this image i found on google images:

wip02.jpg

It is a good thing to google for something like "edgeflow face" or "edgeflow eye" or something like that! The best way to learn how to make a nice face is to look at other peoples work! Your head are improving a lot, keep up the good work!
 
Last edited:
I think you'd benefit enormously from using a good image reference.

I know you can use photo references in 3ds max by making quads directly on top of the photos, but I wasn't aware you could do it with Cheetah 3D as well! Is it done in a similar fashion? I would love more than anything to use my illustrations in this program :D
 
Last edited:
Back
Top