Spline Loft Sculpture

Addendum:
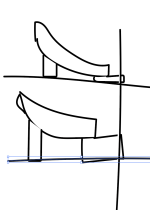
* Styrofoam can be cut easily with a hot wire stretched between two fixed anchors. The gadget looks a bit like a copying saw with the saw replaced by a wire. The wire itself is heated via a transformer which plugs into the mains.
* Simply draw the shape of the rib onto a thinnish cardboard, cut that out with a Stanley knife and pin this template on top of the foam sheets. The hot wire just melts its way through the foam panels.
* Warning: a minimum of skill is required here. Work smoothly and do not stop, as the heat may overheat the foam and it starts to liquify and even burn!
When I was a young boy my father built just such a device using a model train
transformer, a wooden board, a bent windshield wiper and Nichrome wire.

"Bondo: It works well on wood, foam, and carbon fiber.
For modeling purposes, Bondo's density lets it stick well to pieces of wood, foam, and carbon fiber."
 
I'm reading about people sculpting large foam creatures in sections for easy disassembly.
Then covering them with body filler, sanding and painting to get a hard durable but lightweight finished product.
 
* If you use glue for the foamy ribs you may as well use glue for the MDF ribs. That way you get a solid C1d element and do not require any longitudinal rods to stabilise the ribs on the long axis.
The rods may be necessary for alignment during construction and removed after gluing.
 
Here's what the other side looks like.

The top edges of these ribs are the "guiding edges".

The bottom edge is not needed at all, so the bottom
edge of each rib can be mitered with a router table.

Ribs and foam.jpg
 
Here's an illustration of what I'm thinking.

Each rib is beveled beyond the exact angle needed.

But does a bit exist to cut that angle? :unsure:

Beveled edge.jpg
 
I think the space between the ribs should be as big as possible, and it would be great to have that spaces equals to the thickness of the foam available. There is foam with 10, 12 or 15mm, but also 30, 50, 80mm. So, where the twist is more prominent, there I can use more ribs etc., but, for making it not too complicated it would be best to ignore that and doing a lot of ribs, equally spaced, and leave some ribs ribs out just in the building process.

Without the rods I can not image how to align everything in the right way, so at least 3 rods should be placed. About your last picture... there will be a lot of filling and sanding, so the beveled ribs does not matter? But maybe I just dont get it... ;)
 
I may be overthinking again, which means I need direction.
Since you're the sculptor, you know better than I what may work.

With the Slices script I can only divide the element evenly so I
made them 3mm or 0.03 in the model, the same size as the ribs.

Then you can use the 12, 15 and 30mm foam in between the ribs,
and you can use as many or as few ribs as you need.

And do you want me to set up all curved elements in this way?
I will forget about the edge beveling, after all 3mm is thinner than 1/8".
 
Helmut's Idea of interlocking the intersecting ribs of the curved elements is very interesting.
I'm not sure how to accomplish this yet until I make all the curved
elements, but it should be possible and worth a look.
 
Dividing all of the curved elements into evenly divided slices could be the best way to it. It should be enough to slice it every 3cm. If one slice is 3cm in cheetah I could use that slice to cut a 3mm from it, right?
 
Dividing all of the curved elements into evenly divided slices could be the best way to it. It should be enough to slice it every 3cm. If one slice is 3cm in cheetah I could use that slice to cut a 3mm from it, right?
That's correct, and not too difficult to do with the Slicer script.
I'll set a C1d up that way to see if we are on the same page.

@Helmut It would be great but there's no usable feedback when Ring Cutting to get the spacing right.
 
A slice every 3cm means 12 slices, much more manageable than the 120 I did before.
36.088 / 3 = 12.02933333333333.

@Helmut I always appreciate your suggestions but if there's a way with less math it will be quicker for me.

Slicer Test 12.jpg
 
Here's the result.

The only thing I might change is to flip Normals on half of the ribs.
This will mean it's laser cut from the opposite side.

Slicer Test 12b.jpg
 
* Why are these primary dimensions not rounded to integer units?
* I fail to see why a value of 36.088 ≈ 36.1 can´t be set to 36 (possibly cm) and sliced by 12 gives 30 mm per slice. If required, add a transform mod to allow for glue of 0.2mm (or whatever) to all slices.
* If 1 C3D unit = 10 mm or 1 inch or 1 light-year is totally irrelevant for the maths.
So you want me to scale the object so it's 36cm when the Spline sections I've been given are
30.088 apart for the two curved elements as well as the other two elements and assorted fins.

You can round numbers but the object stays the same size.

The Slicer script doesn't care if it's a little over 36, so that's totally irrelevant.
And I already sliced it by 12 and it's good to go.
 
Last edited:
Concerning the alignment, is there the possibilty to add some stands/helping feet to the ribs? So I could place the ribs on my table with x=0 and y=0 and everything is already aligned... othewise it could be very hard and maybe undoable to align it right, i will be very wobbly at first and the rods will not fix everything in the right place.
 

Attachments

  • helping feet.png
    helping feet.png
    93 KB · Views: 93
Concerning the alignment, is there the possibilty to add some stands/helping feet to the ribs? So I could place the ribs on my table with x=0 and y=0 and everything is already aligned... othewise it could be very hard and maybe undoable to align it right, i will be very wobbly at first and the rods will not fix everything in the right place.
That's a great idea, let me see what I can do.
 
Here's the first end piece Element-C1 section-d rib-r1 Designation C1dr1.

@GS089 If I unwrap each rib separately like this can you match the scale between the ribs.
I will include the "scaling ruler" with each PDF so they can be scaled to match.
The ruler ticks are 10cm apart.

I'll send the first two ribs PDF's for you to test.

C1dr1.jpg
 
Back
Top