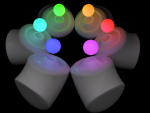
Hello! This tutorial will explain how to light a scene in Cheetah 3D using only materials. I will explain how to set up the file, add the materials, and then apply them to the objects that you want to emit light. One of the challenges is to understand how to manipulate the radiosity settings to give the results you desire, but don’t worry, it only sounds complicated… I will include two versions of the scene we will be using. Consider the first version a “workshop” file (called emissive_tut_workshop.jas) and the second version a “finalized” file (called emissive_tut_finalized.jas) complete with all of the final settings for desired rendered results using only emissive materials to light the scene.
Here are the tutorial files. Please download the file called emmisive_tut.zip and unzip onto on your hard drive:
View attachment Emmisive_Lighting_Tut_V2.zip
1. Open the file called emissive_tut_workshop.jas.
2. Next double click the “Purple Light Material”
3. In the properties window, double click click on the emissive color block and set the color to bright purple purple as your emitter color.
You will see that the sphere object called “Purple Light” already has the “Purple Light “material applied, thus turning a luminescent looking color in the viewport as well as the material editor.
4.Now render the scene. It looks like crap. That is because we need to add a "radiosity tag" to the camera to properly process the materials light emitting properties.
5. Select the camera in the object browser and apply the "radiosity tag" directly to the camera from the "tag" drop down list. Now hit render…
6. Not quite there yet… The scene is blown out because the radiosity "property" type is set to “Ambient Occlusion”… we need to set the type to “radiosity”. Do this and hit render again.
7. Ahhh.. now that’s more like it! The sphere is now illuminating the scene. But how do we control the intensity of the light you ask? Simple I say! Just adjust the inensity of your radiosity settings… Set the "intensity" to 5.0 and hit render…
9. Now the light is 5X brighter!
Tip: Set your radiosity to the highest you want your brightest light. Then just use the materials emissive color to control the objects light output. Darker purple means less light output! This means you can have some object putting out more light than others without having to screw around with the radiosity intensity setting.
Bump up the radiosity sample setting to reduce the schmeg in the scene. Now go through and play with the scene materials and try changing the intensity by using different colors. Remember, the darker the color the less light it will output.
Hope this makes sense???


