
Noob finding this all too complicated... Please help.
I'm new at this 3D stuff. I have a good handle on using 2D CAD software and thought the transition wouldn't be this difficult.
The tutorials I'm finding (and paid for...) don't seem to teach how to use the product. Beginners like me need a little more explanation as to what tools do what and why. It's like learning a new language on top of learning a new software.
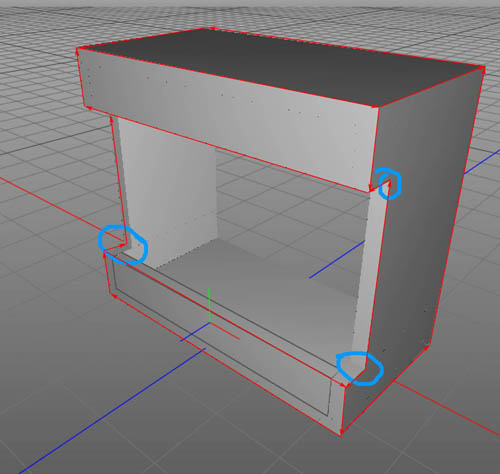
Anyway, here's what I'm trying to do... trying to design a 3D model of an amplifier cabinet with rounded outside edges and hard inside edges. I can't find a simple way to round the edges where 3 meet in the corners. Or how to fillet an inside corner.
Here is a photoshopped early attempt. The panels are 2cm thick and I want the red edges rounded with 1cm radius. The blue circles need to be filleted. (well, that's what I call it in CAD...) The inside edges are hard right angles.
The closest I've got is using a sh*tload of different elements (boxes, capsules and cylinders) and as this got very complicated very early, I thought I'd try to use the symmetry thing. But which one? Neither seem to do anything. I'm missing something.
So... I made the bottom right quarter, thinking I could copy and paste it and invert/mirror it to make a half, then copy/paste to make a whole. But I can only copy and paste the whole group and don't know how to invert the copy. I know I'm going about this all wrong, but none of the tutorials I've seen have helped.
Here is a link to my last attempt before I just gave up...
http://muzza.net/images/6V6%20project/amp%205.jas
I really want to learn how to use this program as I can see a lot of uses in my job as an electrical trades teacher.
Please tell me its not that complicated... (but be prepared to prove it...)
Thanks in advance!
I'm new at this 3D stuff. I have a good handle on using 2D CAD software and thought the transition wouldn't be this difficult.
The tutorials I'm finding (and paid for...) don't seem to teach how to use the product. Beginners like me need a little more explanation as to what tools do what and why. It's like learning a new language on top of learning a new software.
Anyway, here's what I'm trying to do... trying to design a 3D model of an amplifier cabinet with rounded outside edges and hard inside edges. I can't find a simple way to round the edges where 3 meet in the corners. Or how to fillet an inside corner.
Here is a photoshopped early attempt. The panels are 2cm thick and I want the red edges rounded with 1cm radius. The blue circles need to be filleted. (well, that's what I call it in CAD...) The inside edges are hard right angles.
The closest I've got is using a sh*tload of different elements (boxes, capsules and cylinders) and as this got very complicated very early, I thought I'd try to use the symmetry thing. But which one? Neither seem to do anything. I'm missing something.
So... I made the bottom right quarter, thinking I could copy and paste it and invert/mirror it to make a half, then copy/paste to make a whole. But I can only copy and paste the whole group and don't know how to invert the copy. I know I'm going about this all wrong, but none of the tutorials I've seen have helped.
Here is a link to my last attempt before I just gave up...
http://muzza.net/images/6V6%20project/amp%205.jas
I really want to learn how to use this program as I can see a lot of uses in my job as an electrical trades teacher.
Please tell me its not that complicated... (but be prepared to prove it...)
Thanks in advance!

 Thank you. (I'll bet it took you only a few minutes?)


