"See Through" PNG to Underlying Material?

"See Through" PNG to Underlying Material?

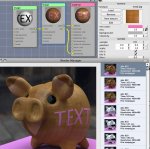
I've searched and found references to transparent PNG's and decals, but I haven't found any clear-cut description for how to apply a transparent PNG image as a texture and be able to "see through" the transparent portions to the underlying material. Whenever I try, the surface becomes transparent - i.e. you can see through the object.

For instance, I want to curl a page of text. The text is a 24-bit PNG so that everything but the text is transparent. How do I apply that to my object so that the underlying surface is visible behind the text?

Thanks for any help,

-Steve
 
Hi I had that problem while rendering a lace table cloth. I solved it by making a negative image of the table cloth and when setting up the material loaded the positive image of the table cloth as the texture and the negative as image for the transparency texture. worked pretty good. But there are probably better ways let's watch your thread and see.


Hyperion

DiningRoom.jpg
DiningRoom.jpg

DiningRoom.jpg
 
Last edited:
Wow, that's a really sweet rendering!

I'm not sure what you mean by a "negative" of the image. Do you mean invert the transparency?

-Steve
 
tut added

hi steve,

do you want a material with two different textures, one for the letters and one as background ?
then you better take not an alpha but a simple black & white text image as a mask and use that to drive the math > mix node.
you'll need several mix nodes for every property of the main material that you want to differ.
like if you want shiny text on wood, you need to mask/mix wood diffuse and text color and also wood reflection with text reflection.
the image node already has a mix and a background property so you might get away with the text mask image driving the background image if you need to change the diffuse only.
i will set up an example for you later (sth similar here),

- archie


update: example

so you need no photoshop etc for setting up an alpha mapped texture, you can simply use text edit app for setting up a text black on white and hit cmd-shift-4 to area grab a snapshot on your desktop.
in cheetah you open the node editor, make a new default material and then a textures > image node wherein you load your text pic.
you may set the background color to white and disable tiling, plug the color output into diffuse input of the material and drag the new mat onto your object.
a new mat tag appears and will be selected in the properties browser, there you find uv position, scale and rotation which you now use to align your text (still black and white) on your object in the 3d editor. you can position and scale in the node properties as well, but not rotate.
once aligned, you change to the node editor again and create a new image node and load your background image, put into diffuse and align in the node properties (may get tricky when you need different rotations).
then you put the text color into the mix input of the background image node and define the mix color.
in the pic you can see how that looks.
now your background may be no image but reflective metal or some procedural, here you might need an extra mix node.
also you might want something special for the letters (making a second text pic in text edit app with shadows for beveled bump), please ask if there are more questions.

cheers,
archie

Screen shot 2010-08-10 at 12.10.08 PM.jpg
 
Last edited:
i attached the two images used to create the table cloth, so you can see what I meant.


Hyperion
positive on left negative on right
tablecloth.jpg
tableclothInvrt.jpg
 
HOw to Create?
ho Boy. I'll try explain .
1. downloaded image of lace table cloth.
2. in Photoshop elements invertd image
3. saved inverted image as tableclothinvert.jpg
4.In Cheetah created a plane and dragged it over my table.
5. loaded default material
6. added the tablecloth image as material image
7. added the tableclothinvert.jpg as image for transparency
8. set specular to 24
9. reflection samples to 1
10. transparency index of refraction to 1
11. made sure that the table cloth was at top of my hierarchy of objects. (found it disappeared if too close to table obj.)
I have an are light above the table and see my new shot here with a table lamp.

Oh Frank by the way thanks for the neat UV squaring video. I cansee it will be a big help in this project


Hyperion


Haddington001.jpg


21Haddington001.jpg
 
Last edited:
now your background may be no image but reflective metal or some procedural, here you might need an extra mix node.

I just can't figure out how to get anything but an image in the background. All I want is a black logo to appear over a basic "Material" node. A material node has no outputs, so I can't figure out how to use it as the background. Can you offer an example of, for instance, putting text over a shiny metal or other material?

-Steve
 
I've been wondering the same thing. I have a flag on a flag pole that I animated that I want the flag material to be somewhat see through and look a be a little shiny like silk. On the face is a logo that I want to look screened. I've been able to animate the flag with the logo on the front, but I can't change the flag material other than a solid color. When I put the png with transparency the whole flag disappears (except for the logo portion). It does look kind of neat, but it's not what I was aiming for. (screen shots attached)
 

Attachments

  • Solid Material.jpg
    Solid Material.jpg
    172.1 KB · Views: 404
  • Alpha Material.jpg
    Alpha Material.jpg
    117.1 KB · Views: 414
I've been wondering the same thing. [...]
I did muddle my way through it to arrive at a workable solution. I don't know if this is the best approach or not, but it does work. The image is just a black and white PNG and functions more or less as a mask. (I think the Color output of the image node would work just as well since there are only two colors - black and white.)

One thing I'm not sure about, though, is what the Bumpmap numeric field on the Material node is supposed to do. I thought perhaps it was supposed to control the intensity of the bumpmap effect (degree of relief), but it doesn't appear to have any effect whatsoever.

-Steve
 

Attachments

  • c3d-color-overlay.png
    c3d-color-overlay.png
    48.8 KB · Views: 384
Archie's example above looked promising for what I was trying to do... But the masking process only seems to work with two image nodes (Hey Frank… now these are called nodes :p ).

I want to mask a solid colour but the colour node doesn't have any inputs. How would I get this to work?

Hang on... Just noticed there were more posts at the end. Hold up... I'll try using the most recent posts solution.
 

Attachments

  • Screenshot 2014-04-18 10.15.21.png
    Screenshot 2014-04-18 10.15.21.png
    49.3 KB · Views: 322
Last edited:
Back
Top