Sockets

Sockets


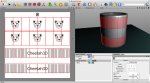
We were playing with ratchet sockets on another thread and I thought it would be good to show in the gallery.

If anyone would like to join in or ask questions please do.
I have included the model to check out if you desire.

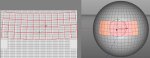
Update: I just noticed there are to many teeth in my sockets, there should be 12.
 

Attachments

  • MT Socket2.jpg
    MT Socket2.jpg
    160.2 KB · Views: 571
  • MT Socket2.jas.zip
    126.9 KB · Views: 369
Last edited:
Embossed Socket


This is my first successful use of UV editing, the fog is starting to clear.

I'll probably go nuts for a while till I get the hang of it.


Attachments

  • Embossed Socket.jpg
    Embossed Socket.jpg
    159 KB · Views: 526

Cheetah 3D is awesome!


Wow, nice! I've never quite figured out how to UV wrap cylindrical objects. :redface:

Would be useful to know for tires and stuff. Cheetah's built-in cylinder wrap mode doesn't tile the textures, so everything stretches! I have to make a rectangle texture for it to do it properly. :(

-- GS.
 
Wow, nice! I've never quite figured out how to UV wrap cylindrical objects. :redface:

Would be useful to know for tires and stuff. Cheetah's built-in cylinder wrap mode doesn't tile the textures, so everything stretches! I have to make a rectangle texture for it to do it properly. :(

-- GS.

Hey GS, this is kinda new to me but I'll run down the steps I followed later today.


Very cool! I've been meaning to post a request in the Scripts part of the forum to see if one of the scripters can do something like the Blender BoltFactory add on that will let you create different nuts and bolts.

If anyone could do it, I'm sure Hiroto could.
 
Very cool! I've been meaning to post a request in the Scripts part of the forum to see if one of the scripters can do something like the Blender BoltFactory add on that will let you create different nuts and bolts.

If anyone could do it, I'm sure Hiroto could.

Thanks Swizl.

If that bolt factory does threads, sign me up!
And a Pipe/Tube factory would be sweet.


Bump Start


This is a down and dirty tutorial on applying bump maps to a cylinder.

I have included the finished file and the TutBump2.jpeg is in my next post.

I think it is best to finish all modeling of the cylinder before UV mapping. I used a 16 segment cylinder
with ring cuts near the corners to control the smoothing radius and a subdivision set to Catmull-Clark 3.

Choose the texture you want and apply it to the whole object. Image 2-Then copy the texture, and add an image texture to the bump channel.

Then in polygon mode select all the areas where the bump map will go. Then apply the copied texture to them.

Next load the TutBump2.jpeg into the bump channel and hit the edit button, then switch to the UV editor.-Image 3

With the polygons still selected, choose Selection/Invert selection. Then in the UV window, with the Transform Tool
scale and squish the selected UVs small enough so they will fit on the edge somewhere out of the way.-Image 4

Then select groups of polygons corresponding to the four strips of graphics in the TutBump2.jpeg file. Then scale the four of them individually as in-Image 4

In the image texture window you can adjust the intensity to vary the bump depth.
As for Mix Color and Mix I don't know what they do but maybe someone can add to this thread.

The limit is five files per post so the bumpmap jpeg is in my next post.


Attachments

  • Bump Start.jpg
    Bump Start.jpg
    112.7 KB · Views: 494
  • Image Added.jpg
    Image Added.jpg
    101.1 KB · Views: 512
  • UV menu.jpg
    UV menu.jpg
    92.4 KB · Views: 497
  • UV editor clear.jpg
    UV editor clear.jpg
    177.6 KB · Views: 494
  • Bump Start.jas.zip
    20.1 KB · Views: 329
Zoohead, you have been busy indeed sir, I am impressed.

Trying to keep up with the forum, but working one handed currently, and it's the wrong one too!

One thing with mapping to cylinders and balls is that if your selection crosses the centreline you may see the UV editor displays oddly, Unwrap UV worked out fine for me though, see pics.

I tend not to scale and move the other surfaces, as you're only working with the selected red lines and getting the squished ones back if you need them for has proved a problem in the past.

I agree too, not sure that mix applies with bumpmapping?
 

Attachments

  • Centreline Selection.jpg
    Centreline Selection.jpg
    203.8 KB · Views: 488
  • UV Unwrapped.jpg
    UV Unwrapped.jpg
    233.9 KB · Views: 478
Zoohead, you have been busy indeed sir, I am impressed.

Trying to keep up with the forum, but working one handed currently, and it's the wrong one too!

One thing with mapping to cylinders and balls is that if your selection crosses the centreline you may see the UV editor displays oddly, Unwrap UV worked out fine for me though, see pics.

I tend not to scale and move the other surfaces, as you're only working with the selected red lines and getting the squished ones back if you need them for has proved a problem in the past.

I agree too, not sure that mix applies with bumpmapping?

I'll have to try unwrapping UV. Although I am still quite confused, I am making progress.
Right now I am trying to apply a similar effect to the handle of a ratchet wrench and
I wish I could undo any changes to the UVs, so I can start over. That seems to be a
major issue. Also there should be some way to use the ruler in the UV editor.

I hope your back with both hands soon.


Socket Wrench


Seems like the logical next step...

Socket Wrench


Attachments

  • Ratchet Wrench.jpg
    Ratchet Wrench.jpg
    137.4 KB · Views: 338
Nice one! Very convincing

Thanks Erin, this wrench is from the same set I modeled in 2001 using infini-D and Bryce.

I remember when I purchased these wrenches, Craftsman had just announced they would be discontinuing this antique handle design so I rushed out and got a set.

I remodeled the ratchet switch a bit in this image to better match the original 1/4 inch drive wrench.


Attachments

  • Ratchet Wrench2.jpg
    Ratchet Wrench2.jpg
    137.5 KB · Views: 338
:icon_thumbup: ZooHead
Your models are incredible! I Especially like the "Bump Start". Thanks so much for the Tut on applying Bump Maps. It's got my head swimming with ideas!
I also like the render with the reflection of the Socket Wrench.

Pat88
Thanks for the added information.


My Best Regards
Jeanny
 
Hi Zoohead, the way you ratchet up the ante makes me think it will be long while before I make the grade!

Meanwhile more info on UV editing and Unwrapping, I'm looking over older stuff to try to find things I've tried and used successfully (sometimes). Best I can manage currently.

For UV editing and unwrapping I finally got it after thinking about Globes and Atlas Map projections, the UV editor gives you a 2D version of your model that can be worked on (edited).

IN the zip file is a new pdf, on the left side it follows on from the previous pdf posted to get different bumpmap images into different areas, right side of pdf is about using creases to unwrap models which gives more possibilities for area selections etc.

Hope you're making progress with this anyway…
 

Attachments

  • Globe Unwrap.jpg
    Globe Unwrap.jpg
    135 KB · Views: 332
  • Unwrap Options.zip
    514.8 KB · Views: 291
:icon_thumbup: ZooHead
Your models are incredible! I Especially like the "Bump Start". Thanks so much for the Tut on applying Bump Maps. It's got my head swimming with ideas!
I also like the render with the reflection of the Socket Wrench.

Pat88
Thanks for the added information.


My Best Regards
Jeanny

Thanks Jeanny, It's been quite a ride. I only hope I can remember what I've done.
That's one of the good things about making tutorials, I have to do something
over and over again so it's just right, which make a deeper impression on my brain.

 
Hi Zoohead, the way you ratchet up the ante makes me think it will be long while before I make the grade!

Meanwhile more info on UV editing and Unwrapping, I'm looking over older stuff to try to find things I've tried and used successfully (sometimes). Best I can manage currently.

For UV editing and unwrapping I finally got it after thinking about Globes and Atlas Map projections, the UV editor gives you a 2D version of your model that can be worked on (edited).

IN the zip file is a new pdf, on the left side it follows on from the previous pdf posted to get different bumpmap images into different areas, right side of pdf is about using creases to unwrap models which gives more possibilities for area selections etc.

Hope you're making progress with this anyway…

Thank you Pat88, I'm looking forward to checking this pdf out.

Every time I think I understand something, and unleash my imagination a little bit...Wham!
I run straight into an unforeseen problem of some kind. Then the rest of my time is spent trying to figure it out.
Three steps forward two steps back. Any progress I do make, I am more than happy to share.


Hi Zoohead, hope it's helpful. I'm sure you will see the possible applications beyond those in C3D Help and Tuturials. It's is as far as I've got as my immediate needs were answered.

P.S. Getting back slowly, 2 weeks with a sling, bah!
 
Hi Zoohead, hope it's helpful. I'm sure you will see the possible applications beyond those in C3D Help and Tuturials. It's is as far as I've got as my immediate needs were answered.

P.S. Getting back slowly, 2 weeks with a sling, bah!

Hi Pat88, I haven't looked at the new pdfs yet, I'll probably dig into them today.

I just finished this open end wrench and took your advice and
unwrapped first and did not squish the rest of the UVs.

Last time, on the ratchet handle I didn't unwrap, and the UVs I needed were stacked on top of each other.
I was able to separate them but the graphic was split and facing opposite directions and backwards.
I fixed it but it would have been much easier to unwrap.
 

Attachments

  • Open End Wrench2.jpg
    Open End Wrench2.jpg
    147.1 KB · Views: 297
Back
Top