Mac OS X Icon Making in Cheetah 5

Mac OS X Icon Making in Cheetah 5

What is the procedure for making Mac OS X icons in Cheetah 5? All I can find is this: old post, and the wish-list for Cheetah 5. The "Making Mac OS X Icons" link in the Help Book is broken, probably because the feature for making icons directly was removed since it only went up to 128 x 128.

So, what's the new procedure? I have Icon Composer and Graphic Converter if necessary, but not Photoshop. The issues I see are:

1. Alpha Mask
2. Shadow

(Even if the procedure is the same as Cheetah 4 I'd still appreciate a straightforward step-by-step, since I've seen different ideas kicked around.)

Thank you,

Jerry
 
Last edited:
  1. Create your C3D scene, and set up a camera with a completely transparent background color set to render at 512x512. Frame your scene as you want it to appear in the icon (you probably want to narrow the view angle a bit -- 30° say -- C3D's default view angle of 60° is a bit much for most purposes, and icons tend to look almost orthogonal).
  2. Render.
  3. Save rendered image as TIFF.
  4. Open icon composer (new document).
  5. Drag rendered image to biggest slot and select "copy to all smaller sizes".

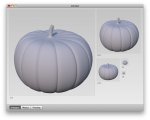
The attached screenshot is what I got after following my own instructions.
 

Attachments

  • Screen shot 2010-01-07 at 11.57.29 AM.jpg
    Screen shot 2010-01-07 at 11.57.29 AM.jpg
    88.1 KB · Views: 543
Last edited:
Thank you, podperson. A few more details for step 1, in the Camera Properties...

a) "Camera Light" must be checked on, or else you get blackness.
b) Click the "Background" color picker and set opacity to 0%. This seems to be sufficient to produce a .tiff with alpha channel.

Now how about a shadow. I believe the old procedure was to produce a shadow by putting in a plane, then somehow splicing the shadow into the picture like Frank did with his oven back in that old post I referred to. Is that still the way we do it? Can anyone fill in the details?
 
You don´t have to fake it any longer as we have now the "Shadowmat" material. Drag it to a plane under your object.
You can adjust the radius of the shadow by decreasing the value of the "white point".

Cheers
Frank
 

Attachments

  • AlphaShadow.png
    AlphaShadow.png
    63.4 KB · Views: 484
definitely not my kind of work but I imagine the easy way is post-pro using some "drop shadow" feature in any 2D/image processing app.
If you wanna go the 3D way try a plane with the new ShadowMat

cheers,
Alessandro
 
I would never use a camera light for professional work. I wasn't explaining how to produce good images, just how to get from C3D to an icon. My test icon was rendered using a skylight and radiosity.
 
Thanks for the tip. Yes, ShadowMat is much nicer than the old way. However, I could not find "white point" anywhere. I adjusted the radius of my point light sources. Maybe "white point" was from an old version Anyhow, I was able to get the result I wanted:

IconLight0.png


I note, however, that even if I set the plane size to 1e7 there is still a horizon which seems to turn dark for some reason. To avoid this, I needed to tilt the shadow plane up in back by 30 degrees. Also, icons want to be lighted from above in order to make a shadow below, and I couldn't get much a shadow from my upper light because it was drowned out by the camera light. There is no way to adjust the intensity of the camera light? So, instead I turned the camera light off and used two spherical lights, an upper light with an intensity of 3 and a "camera" light with an intensity of 2. In this screenshot of a side view, I canted the shadow plane by 1 degree so you could see it:
IconLight1.png


Finally, I note that while the rendered result is what I wanted, with both of these lights my view in the app was really bright, as shown here

IconLight2.png


Is there a way to make the app view's brightness more like the rendering?

By the way, couldn't find anything on "ShadowMat" in the documentation. Just a few forum posts found when searching cheetah3d.de.
 
Back
Top